Introduction:
What is Heroku:
Heroku is a cloud platform as a service (PaaS). It supports several programming languages. On Heroku, a developer can build, run, and operate applications entirely in the cloud.
In this article, we will deploy an Angular application on Heroku from Github.
Create an Angular App:
You can skip this step, if you already have an Angular application.
Prerequisite: You should have the NodeJS(download), Angular CLI (download), and Github(download) installed on your system.
- Run the following command in your terminal or command prompt to create an Angular application.
ng new heroku-app
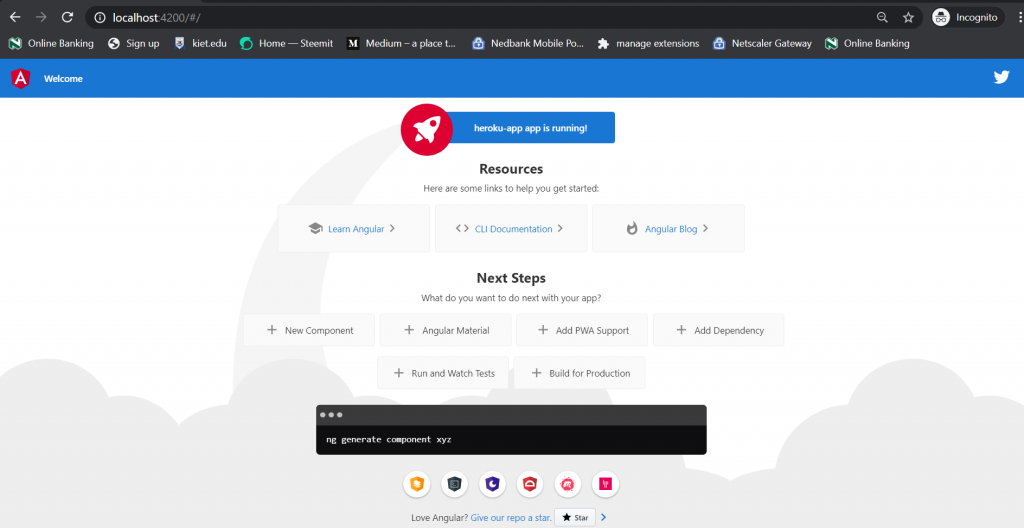
2. Run the following commands to build the app and open your browser at http://localhost:4200.
cd heroku-app
ng serve
Add Github into the Angular project:
Angular automatically configure the git for us but we still need to add a remote repository. Use the following commands to add remote origin and to push the code on Github.
Add the remote origin:
git remote add origin https://github.com/username/heroku-app.git

Commit and Push the code on github:
git add .
git commit -m "first commit" (Commit the changes)
git push -u origin master (To push the changes)
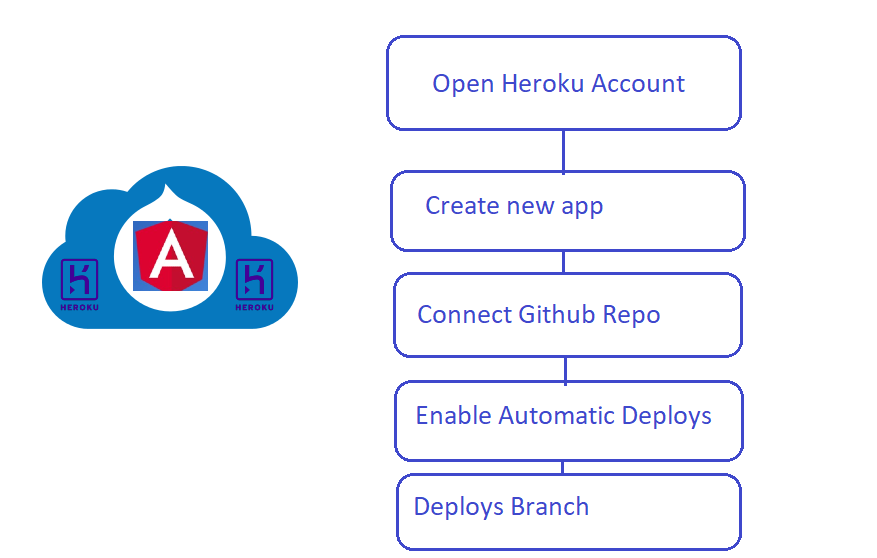
Deploy the app on the Heroku:
Create an account on the Heroku and follow the following steps.
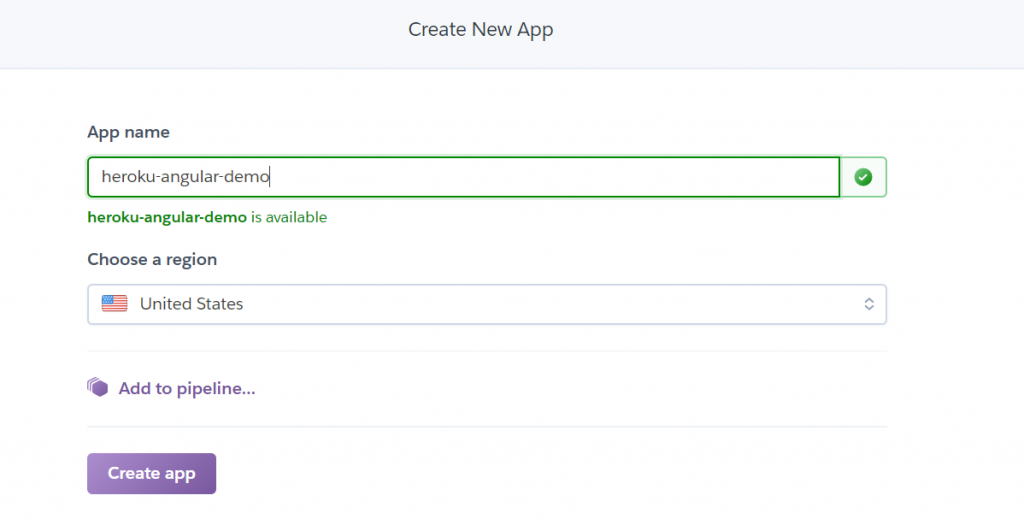
Go to the https://dashboard.heroku.com/apps and create a new app.

Enter the unique app name and hit the create app button:
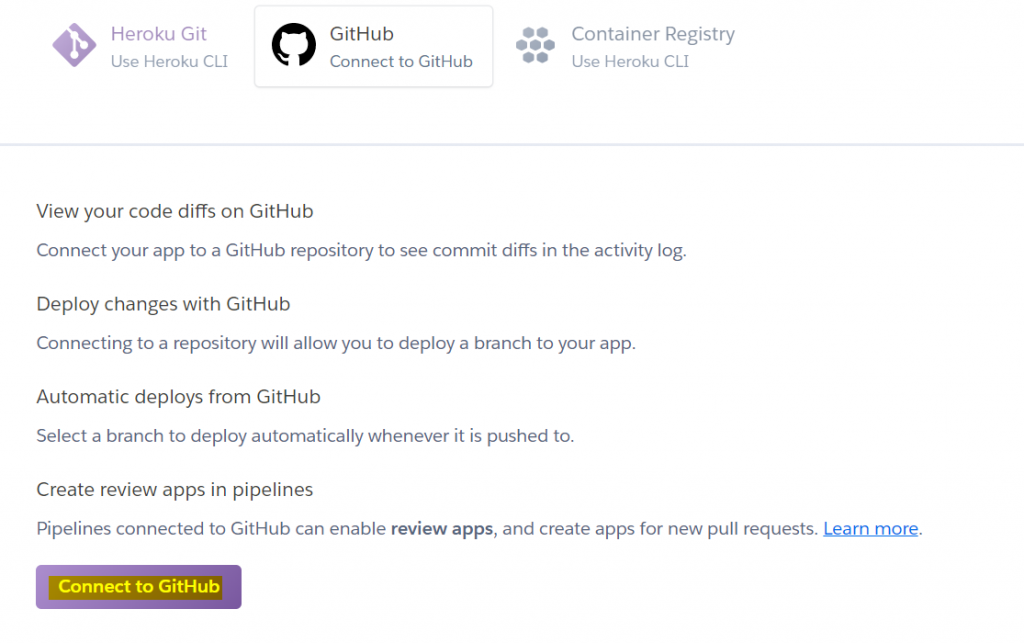
Select the Github from the available options and scroll down.
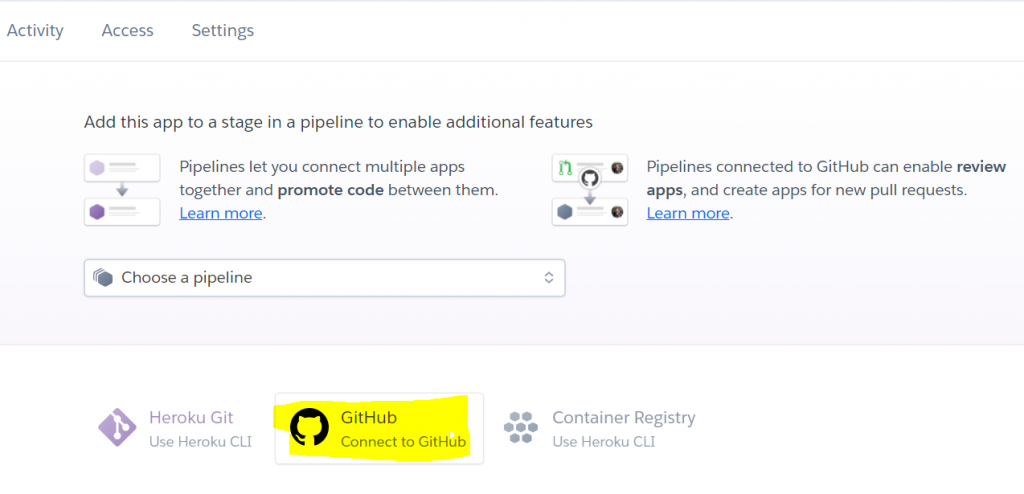
Connect to Github by hitting ‘Connect to Github’ button:
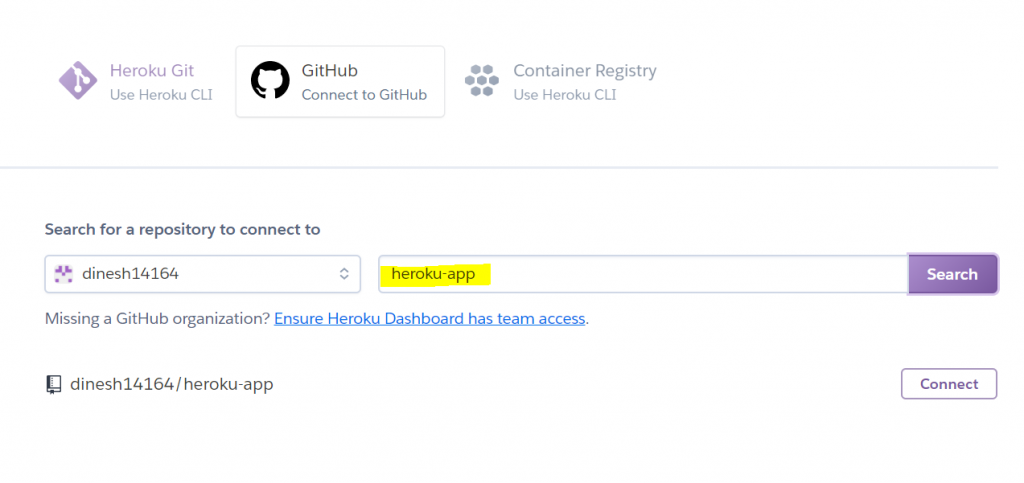
Enter the repository name in the search box and hit the search button. If the repository exists on the Github it will fetch from the Github and show a connect button in front of it. Now hit the connect button to connect Heroku with your Github repository.
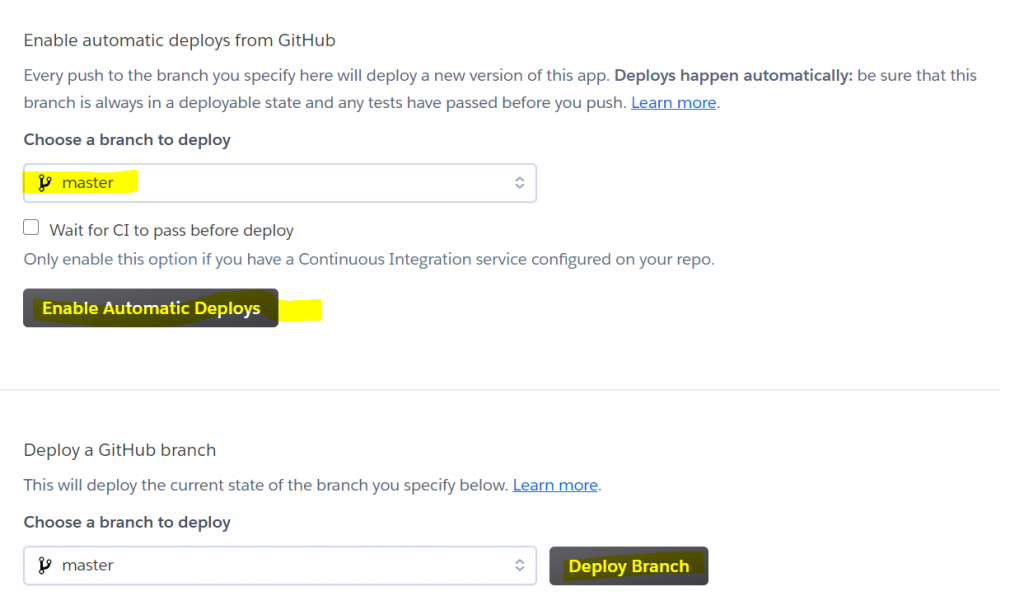
Scroll down and choose a branch to deploy and click the ‘Enable Automatic Deploys‘ button to enable automatic deployment when the new change comes to branch, and then hit the ‘Deploy Branch’ to deploy the app on Github.
Wait for a few minutes, after the successful deployment a view button will appear, hit that view button to open the app.
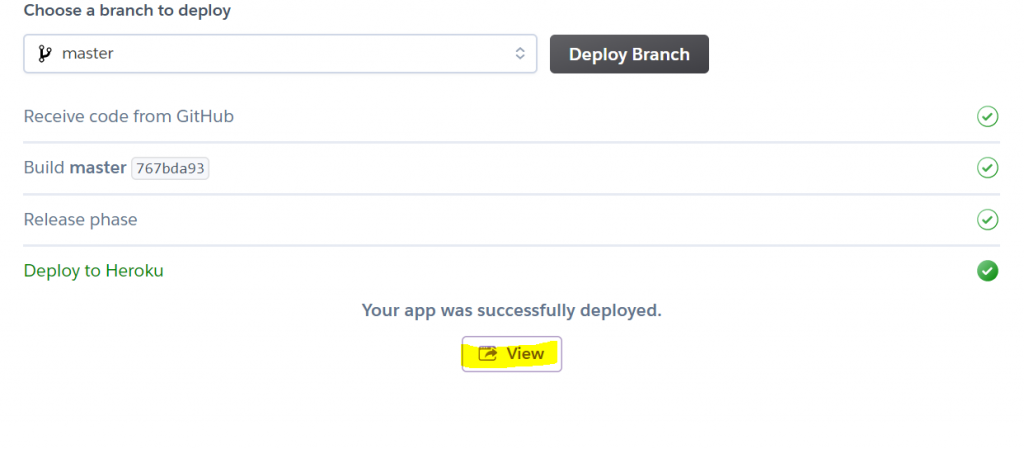
In our case, when we click the view button the app will be opened on the following URL.
https://heroku-angular-demo.herokuapp.com/
Configure the Angular app for Heroku:
When you will hit the view button you will definitely get an error since we need to add some configuration in our Angular app to run it successfully on the Heroku.
Project updates:
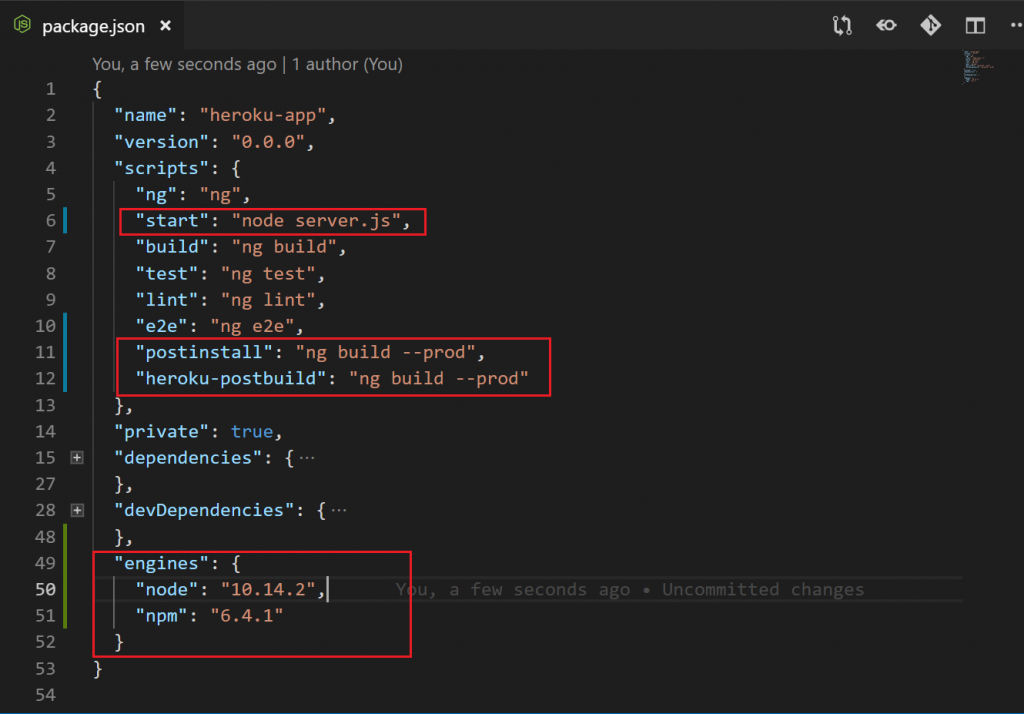
Update the following fields in your package.json file.
Add the server.js file in your project directory and add the following code.
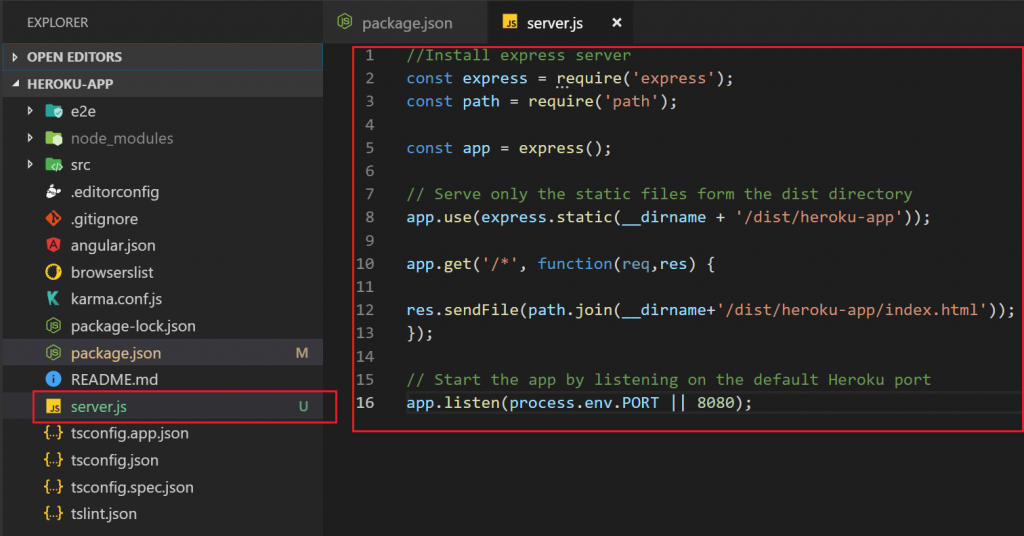
//Install express server
const express = require('express');
const path = require('path');

const app = express();

// Serve only the static files form the dist directory
app.use(express.static(__dirname + '/dist/heroku-app'));

app.get('/*', function(req,res) {

res.sendFile(path.join(__dirname+'/dist/heroku-app/index.html'));
});

// Start the app by listening on the default Heroku port
app.listen(process.env.PORT || 8080);
Run the following commands to make server.js runnable.
npm install express --save
npm install path --save
Push your changes on your branch:
Run the following commands to push the changes.
git add .
git commit -m "second commit"
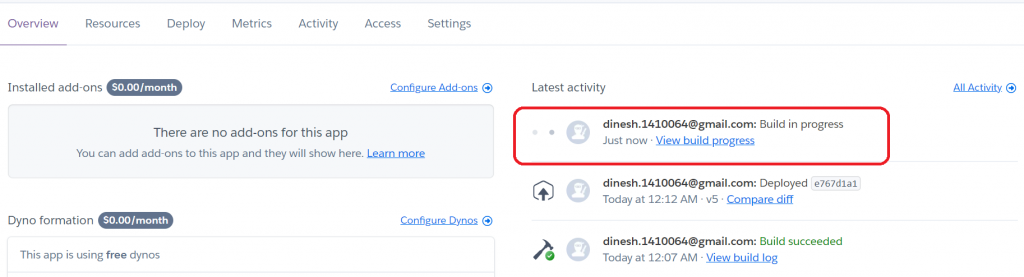
git push -u origin masterNow open your Heroku dashboard and see in the overview section to track your deployment status.
After the successful deployment, open the app again.
In our case, you can see the demo: https://heroku-angular-demo.herokuapp.com/