Internalization in ionic is a way to develop multilanguage app. Most of client/users belonged to different. So we need local language in app according to country.
Let’s continue on code part :-
We need package i.e @ngx-translate/core , so go to terminal and type
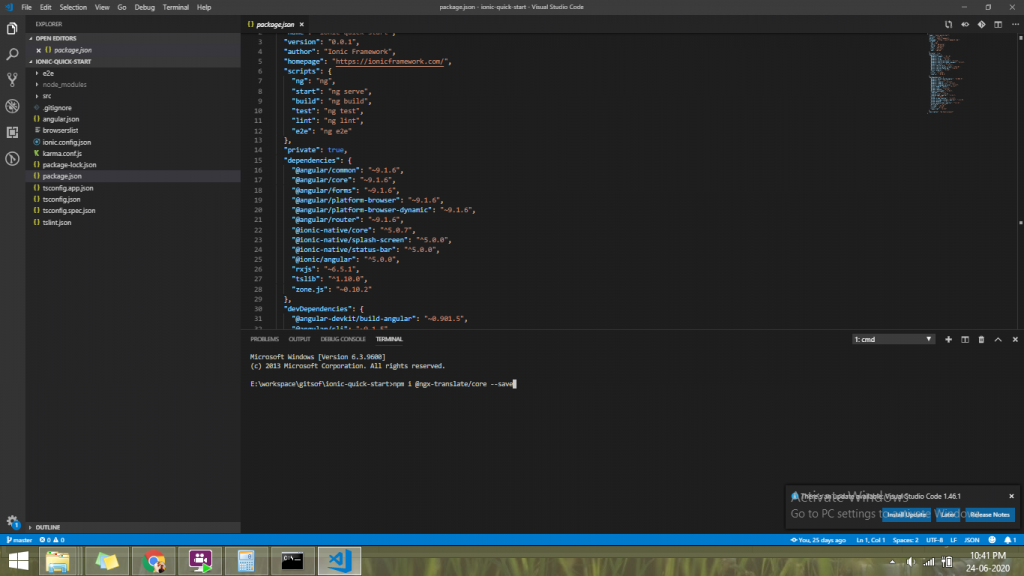
| npm i @ngx-translate/core –save |
After installing “ngx translate” package . Then go to “assets” folder and make a new folder “i18n”. Inside the “i18n” folder, we need to create language JSON file such as “en.json” “fr.json”.
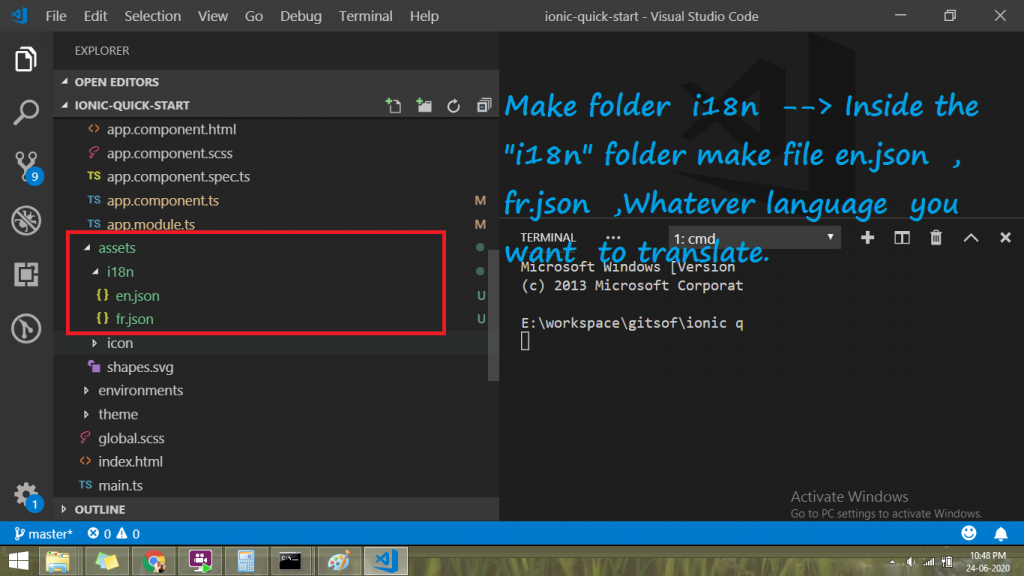
Go to “en.json” file and paste given below .
//en.json
{
"GOOGLE" :"Google is my friends",
"TESTINGLANG" : [ {"INDEX" : "0" , "DATA" : "data 0"} ,   {"INDEX" : "1" ,  "DATA" :  "data 1"}]

}
//fr.json
{
"GOOGLE" :"Google est mon ami",
"TESTINGLANG" : [ {"INDEX" : "0" , "DATA" : "données 0"} ,
{"INDEX" : "1" , "DATA" : "données 1"}]
}
Then go to “app.module.ts” and import “HttpClientModule and “TranslateModule”. Paste given below Code.
// import on header of app.module.ts Internalization Point of view
import {HttpClientModule, HttpClient} from '@angular/common/http';
import {TranslateModule, TranslateLoader} from '@ngx-translate/core';
import {TranslateHttpLoader} from '@ngx-translate/http-loader';
export function HttpLoaderFactory(http: HttpClient) {
return new TranslateHttpLoader(http);
}
//internalization End block
///inside to imports[] block and type
// for internalizaion Point of view ,
HttpClientModule,
TranslateModule.forRoot({
loader: {
provide: TranslateLoader,
useFactory: HttpLoaderFactory,
deps: [HttpClient]
}
})
// internalization End Block
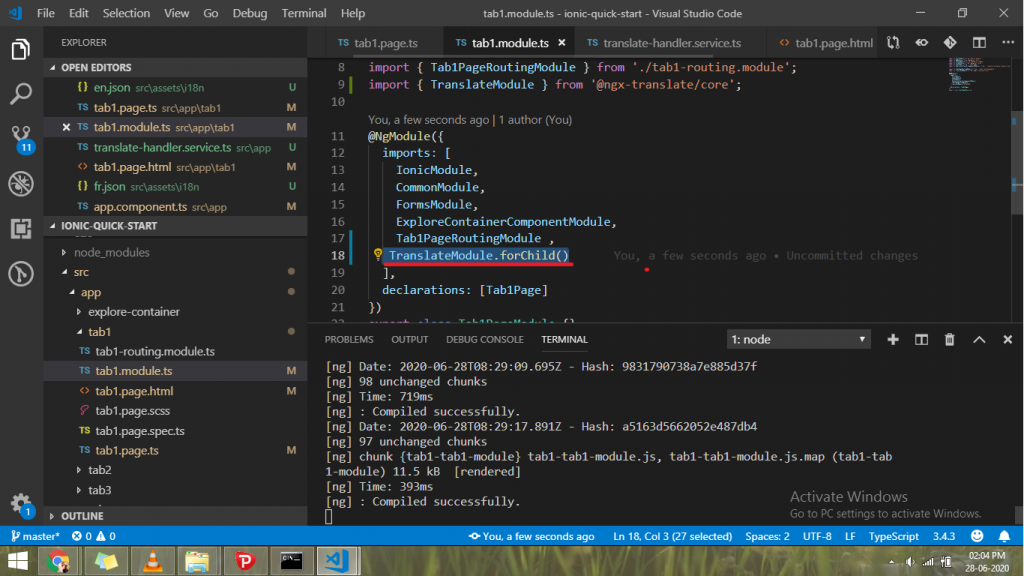
///After that, Go to component or pages where you want to use it. In this scenario .i am taking “tab1.page.ts”. So simply inject translate services , and “TranslateModule.forChild()” module on tab1.module.ts. i will break this point into for better understand .
- “tab1.module.ts” file — > imports : [TranslateModule.forChild()]
2.Generates new service to manage all translation . Go to terminal and write “ionic g service translate-handler”. Then paste given below code on translate-handler.service.ts
import { Injectable } from '@angular/core';
import { TranslateService } from '@ngx-translate/core';
@Injectable({
  providedIn: 'root'
})
export class TranslateHandlerService {
  selectTransData: any;

  constructor(  public  translate  :  TranslateService)  {
    this.getSelectionData(this.translate.getBrowserLang())
   }


getSelectionData ( data) {
  this.translate.use( data)

  // this.translate.get('GOOGLE').subscribe((data)=>{
  //   console.log(data  ,   "$data for testing lang");
  //   this.selectTransData  =  data
  // })
  this.translate.get('TESTINGLANG').subscribe((data)=>{
    console.log(data  ,   "$data for testing lang");
    this.selectTransData  =  data
  })
}

}
Go to tab1.page.ts and paste given below.
//  Import  Two service on header on  page.ts
import { TranslateService } from '@ngx-translate/core';
import { TranslateHandlerService } from '../translate-handler.service';


//Add Given below code on the class block
 arrayData: any;

  selectData  :  string;
  constructor(   public  translate: TranslateService ,
     public  translateHadlerServices :  TranslateHandlerService) {

  this.tralateHandler()
  }
  tralateHandler(){

    this.translate.get('TESTINGLANG').subscribe((data)=>{
      console.log(data  ,   "data for testing lang");
      this.arrayData  =  data ;
  })

  }
  manageSelection(){

console.log(this.selectData);
this.translateHadlerServices.getSelectionData( this.selectData)


  }
then go tab1.page.html and paste given below code .
<ion-header [translucent]="true">
  <ion-toolbar>
    <ion-title>
      Tab 1
    </ion-title>
  </ion-toolbar>
</ion-header>

<ion-content [fullscreen]="true">
    <ion-item>
        <ion-label>change language</ion-label>
        <ion-select placeholder="Select One"   (ionChange)="manageSelection()"   [(ngModel)]="selectData"  >
          <ion-select-option value="en">English</ion-select-option>
          <ion-select-option value="fr">French</ion-select-option>
        </ion-select>
      </ion-item>

  <ion-header collapse="condense">
    <ion-toolbar>
      <ion-title size="large">Tab 1</ion-title>
    </ion-toolbar>
  </ion-header>

  <!-- <a href="mailto:test@example.com?subject=Testing out mailto!">First Example</a>
You can also add text into the body of the message by adding &body=body to the end of the tag, as shown in the example below.

<a href="mailto:test@example.com?subject=Testing out mailto!&body=This is only a test!">Second Example</a> -->

<h1>   {{ 'GOOGLE' | translate}}</h1>

<div  *ngIf="arrayData" >
  <div *ngFor="let item of translateHadlerServices.selectTransData">
    {{item    |  json}}

  </div>
</div>


  <!-- <app-explore-container name="Tab 1 page"></app-explore-container> -->
</ion-content>
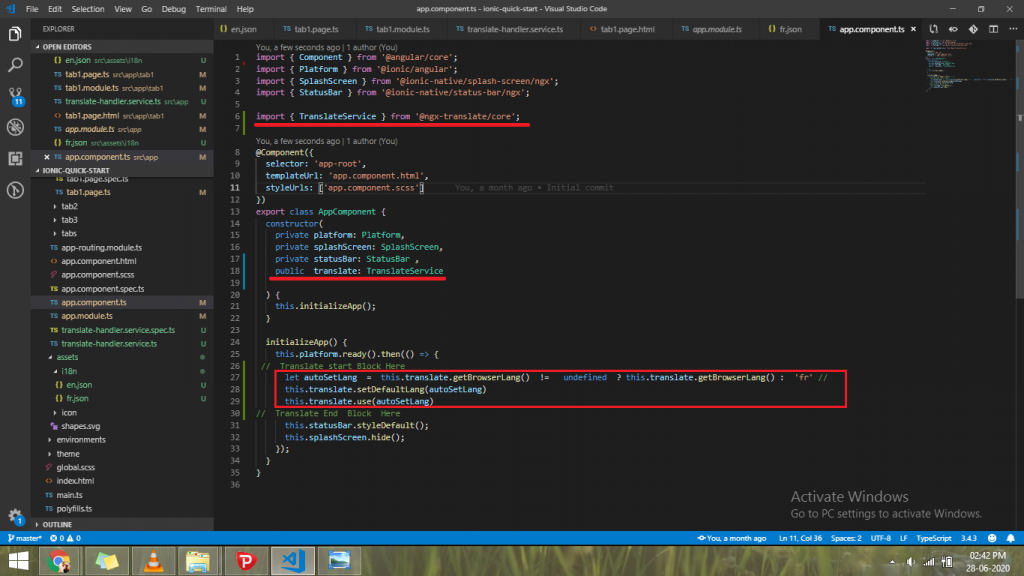
If you want to change language automatically according to country. If that language available in app. Simply to go to “app.component.ts” , and write inside the block “this.platform.ready()”. Please follow given below to better understand .
import { Component } from '@angular/core';
import { Platform } from '@ionic/angular';
import { SplashScreen } from '@ionic-native/splash-screen/ngx';
import { StatusBar } from '@ionic-native/status-bar/ngx';

import { TranslateService } from '@ngx-translate/core';

@Component({
  selector: 'app-root',
  templateUrl: 'app.component.html',
  styleUrls: ['app.component.scss']
})
export class AppComponent {
  constructor(
    private platform: Platform,
    private splashScreen: SplashScreen,
    private statusBar: StatusBar ,
    public  translate: TranslateService

  ) {
    this.initializeApp();
  }

  initializeApp() {
    this.platform.ready().then(() => {
 //  Translate start Block Here
      let autoSetLang  =  this.translate.getBrowserLang()  !=   undefined  ? this.translate.getBrowserLang() :  'fr' //
      this.translate.setDefaultLang(autoSetLang)
      this.translate.use(autoSetLang)
//  Translate End  Block  Here
      this.statusBar.styleDefault();
      this.splashScreen.hide();
    });
  }
}
Grab code from github and please follow on twitter https://twitter.com/divyajeetfx
https://github.com/divyajeetsingh/internalization-in-ionic-4/